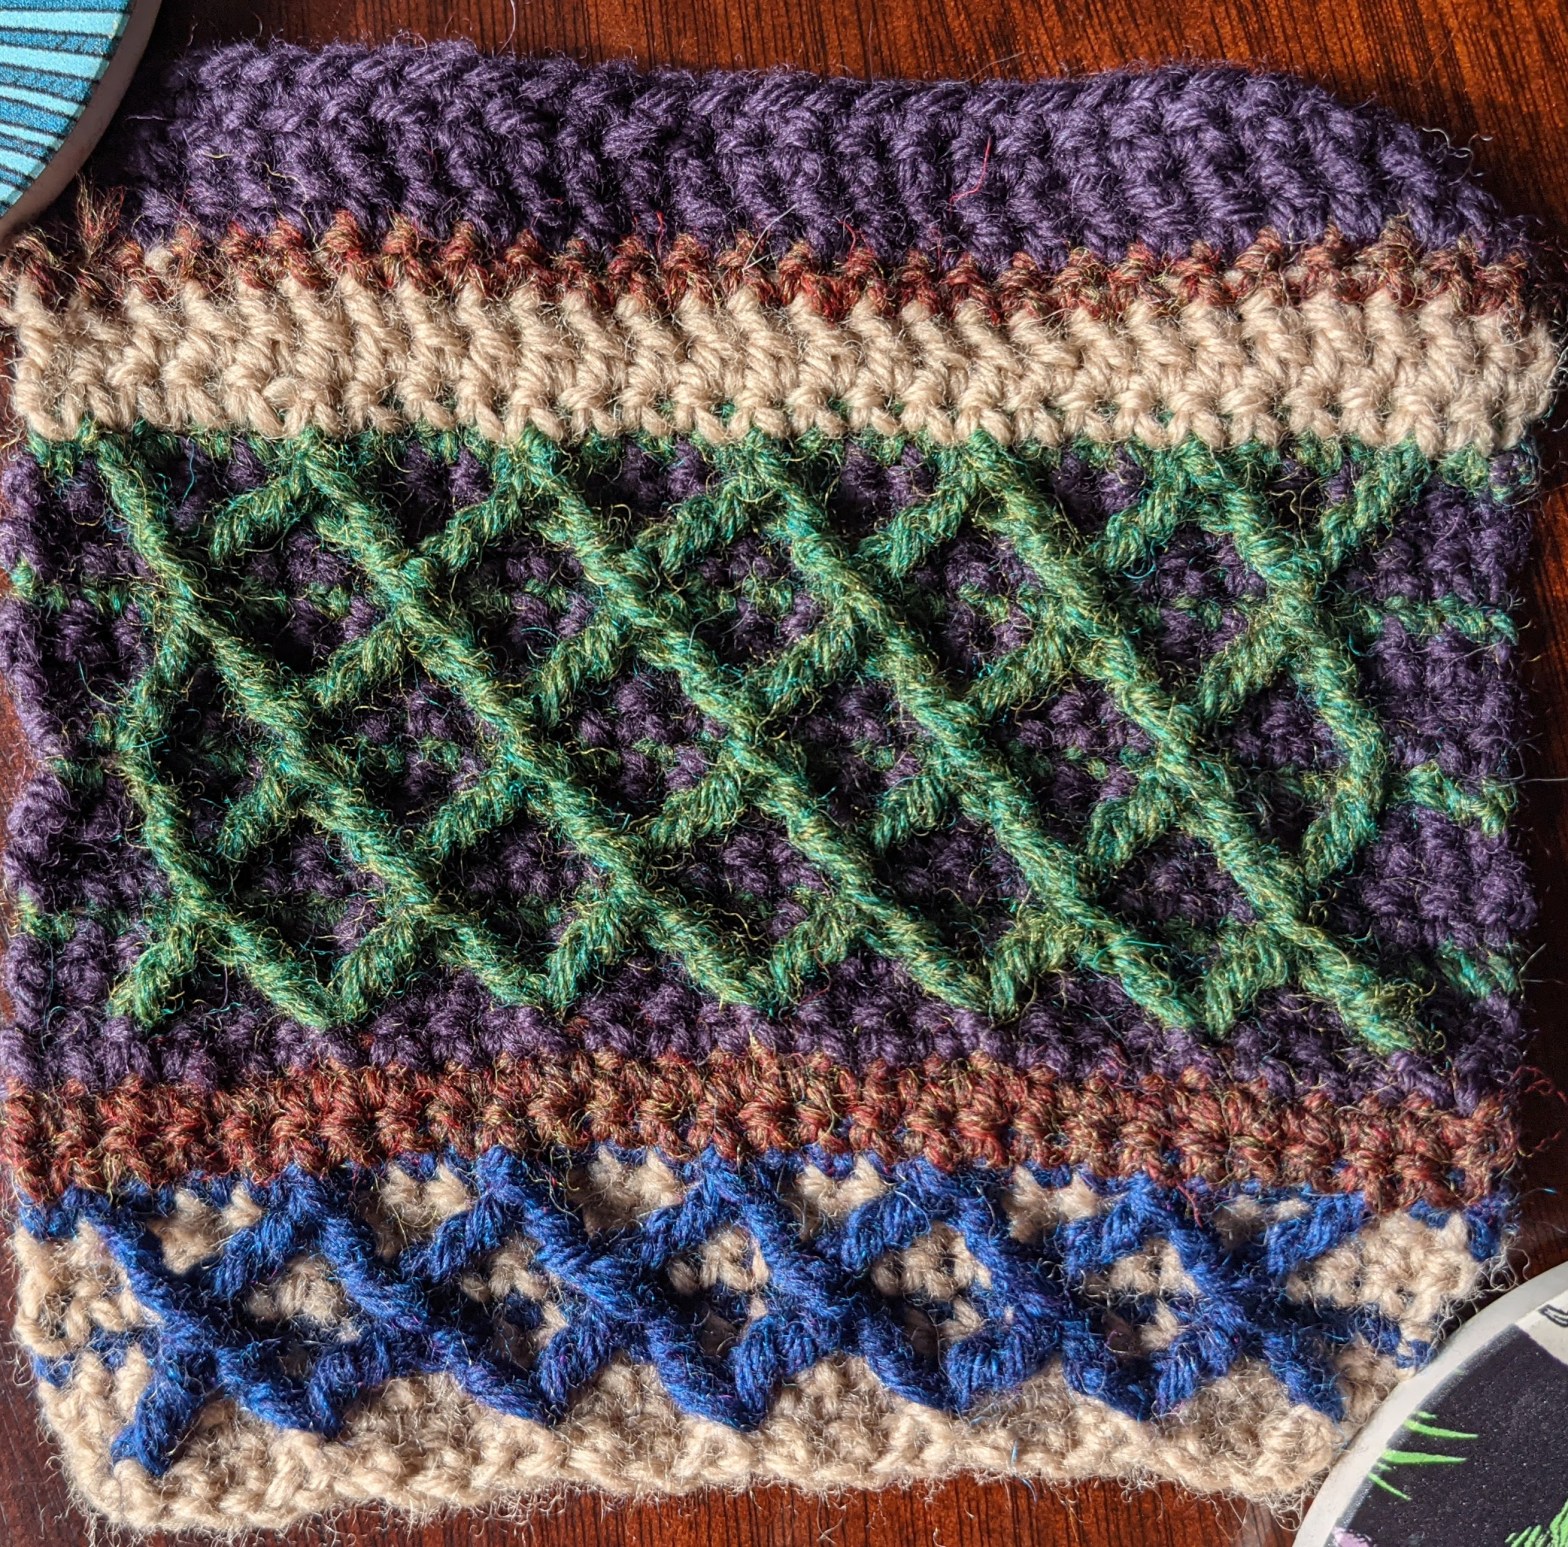
Y’all, I cannot express to you how happy I am with the way this square came out. Someone get the Happy Clichés off the high shelf and just let them unspool around the floor so I can swim around in them and throw them over my head and, just, like, make it rain happy clichés.
The Outfit
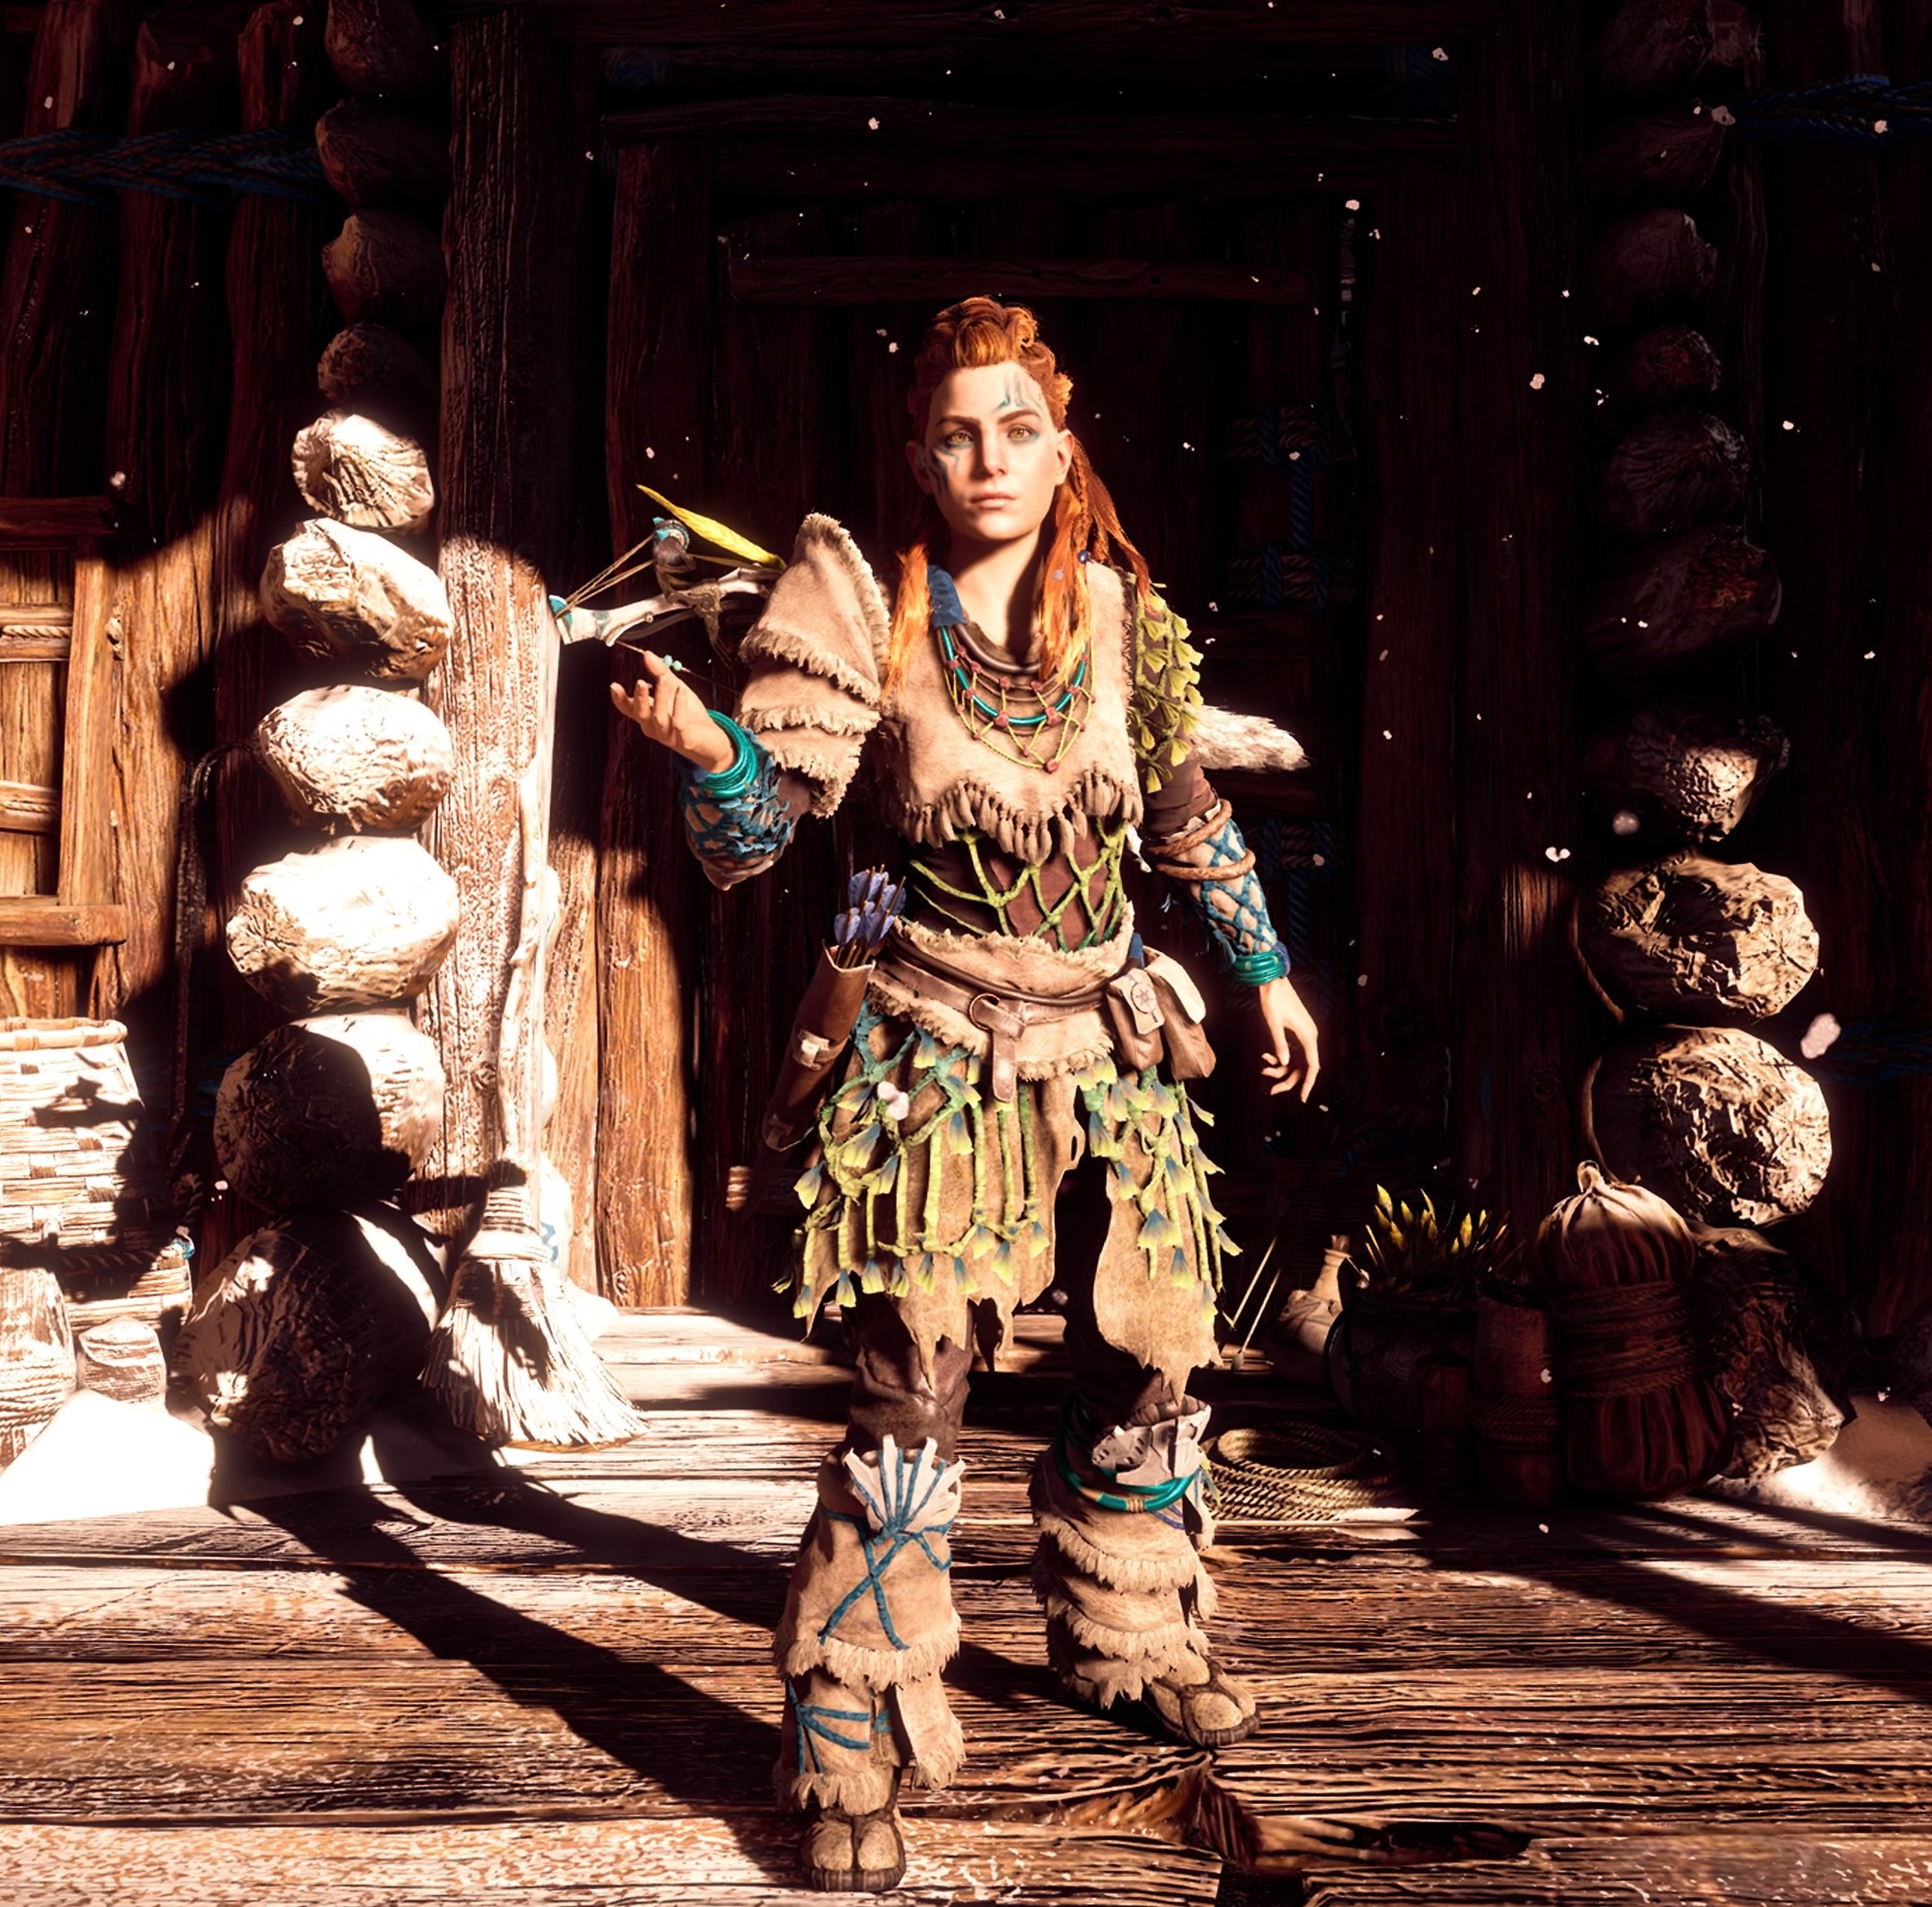
As I mentioned last time, the Silent Hunter is one of my favorite outfits. First for the aesthetic. That deep purple of the undershirt alone makes it stand out from the Survivor and the Protector before you even get to the ghillie suit-esque green mesh. Despite teenage me trying to be Not Like the Other Girls, once I got over that it turns out I love pinks and purples.
While I wanted to base all my squares off the Heavy versions of the outfits, I prefer the Light version without the green. As I have mentioned a lot, I care deeply about what my video game characters are wearing. Here’s what I like to do: wear the Light version of this or a few other outfits because in them Aloy looks fabulous, and once I get into a fight I switch over to something that offers actual protection. Or I forget to do that and wonder why I’m powering through so much healing until the fight is over. Either way, I have a lot of fun.
The other reason I wear this outfit a lot is for the perks. I am not the kind of player that likes charging in for close combat. I did every bandit camp in this game the same way: I moved from one patch of sneaky grass to another picking off bandits one by one until everybody was dead. The more damage I could do to a machine before it noticed me, the better. The Heavy and the Master versions of this outfit add in another sneaky bonus: running past machines you don’t particularly feel like fighting at that exact moment. There’s a skill you can get that reduces the sound you make when you run, and if you pair that skill with the Silent Hunter you can essentially slap a Watcher on its ass as you whizz by and they’ll be none the wiser.
The Master Silent Hunter was added with the Frozen Wilds DLC, and mostly exists as an excuse to let Aloy wear Sona’s outfit, which I am immensely grateful for.

The Square
So, I’m still using The Big Book of Granny Squares, and this is a modified version of the Lattice square. The instructions on this square didn’t have any errors that I noticed, but I’m not entirely sure because there’s a strike 2 against this book: it’s confusing as shit. There were quite a few complaints in the Amazon reviews about how everything is written out and there are no diagrams. Crochet diagrams look like this:

Now, I have not learned how to read these, so this looks like someone mixed up some spaghetti and Spaghetti-o’s and just splatted them all onto a page. But if you do understand how to read these, it can make instructions incredibly easy and clear cut. I plan on learning how to read these for my next project, because I’ll be pulling patterns off the internet instead of relying on one (poorly edited) book. The only reason I’m not learning now is because the book doesn’t have any!
It’s all written instructions. Poorly written instructions. Here’s how the lattice stitches are explained:


This is how my first attempt came out:
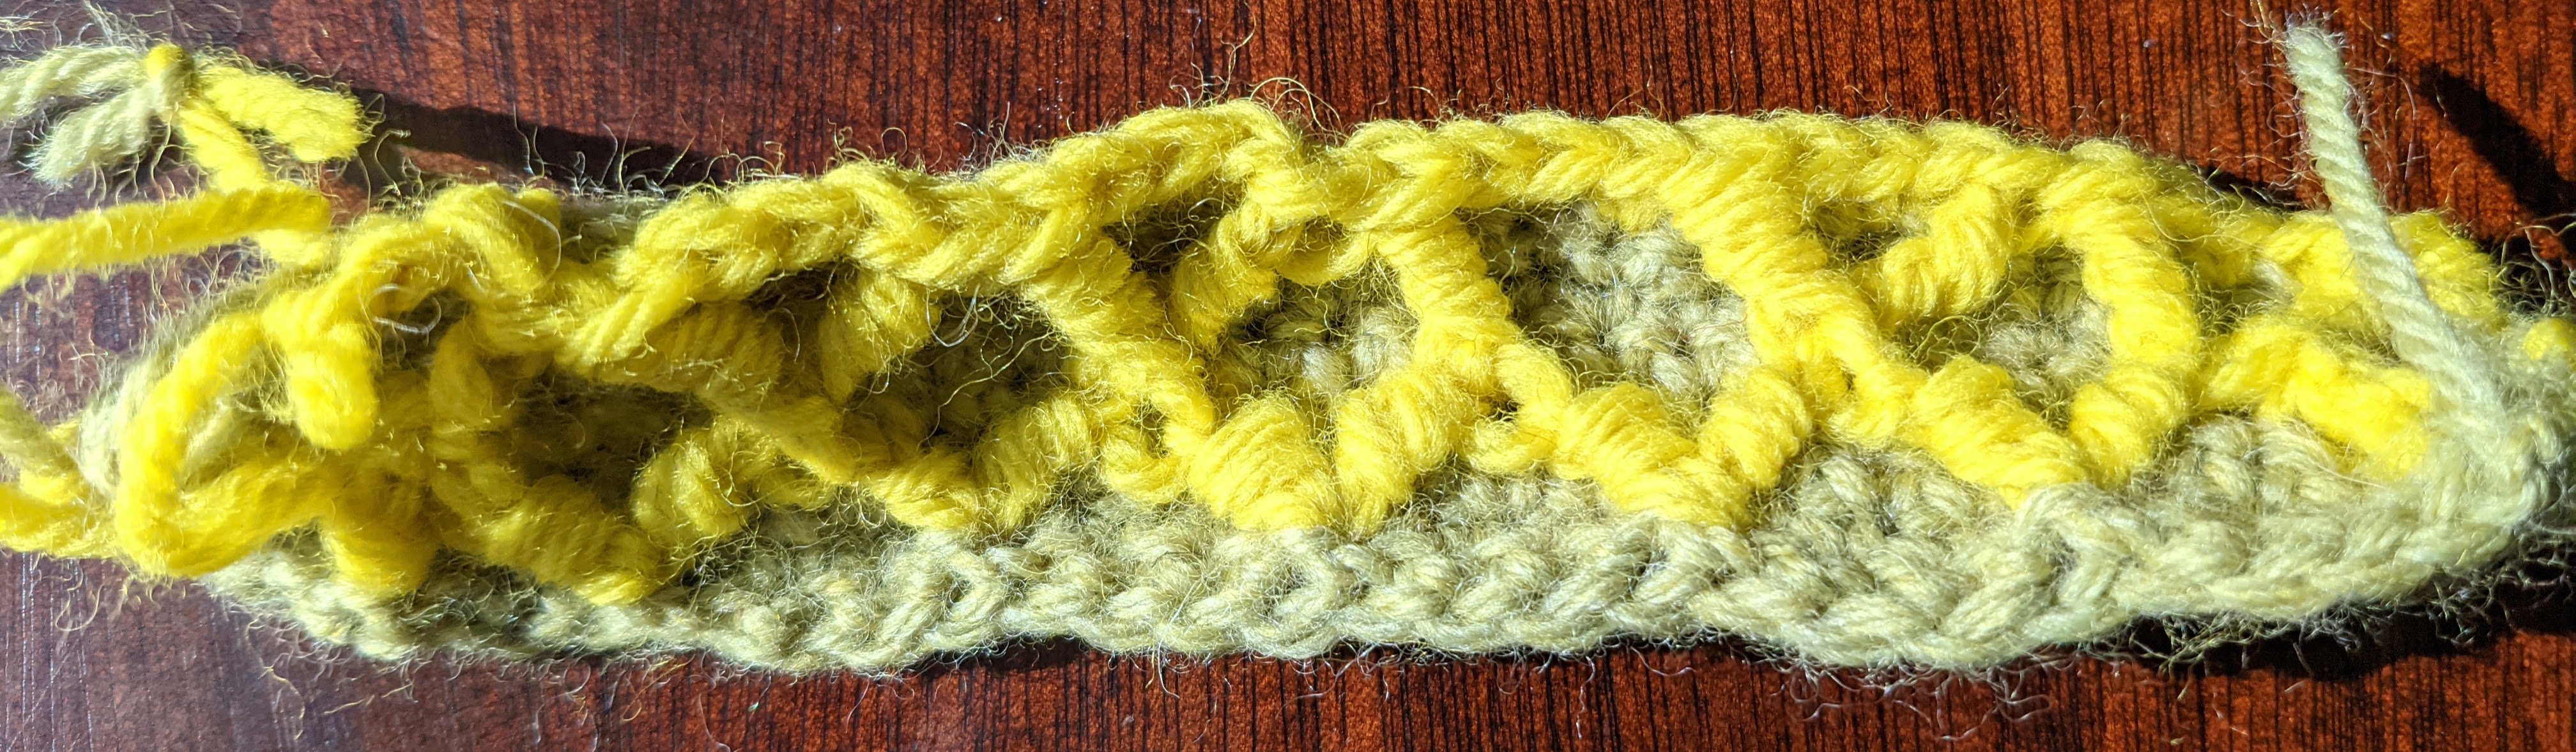
My issue was entirely with the phrase ‘joined at top’ in the FPtr2tog special stitch. What does that mean? Well, as a beginner, to a beginner it means nothing. Of course it’s going to be joined at the top, that’s where the stitch is anchored. I figured out on my own that what they meant was to start the first Front-post treble stitch and only pull through the loops twice. Then, with two loops still on the hook, start the second Front-Post treble stitch, and the last time you pull the yarn through the loops, you pull the yarn through everything, closing both stitches and leaving one loop on the hook. I barely know what I’m doing and I feel like I just offered a better explanation for what I was supposed to do than they did, because all they said was ‘joined at top.’
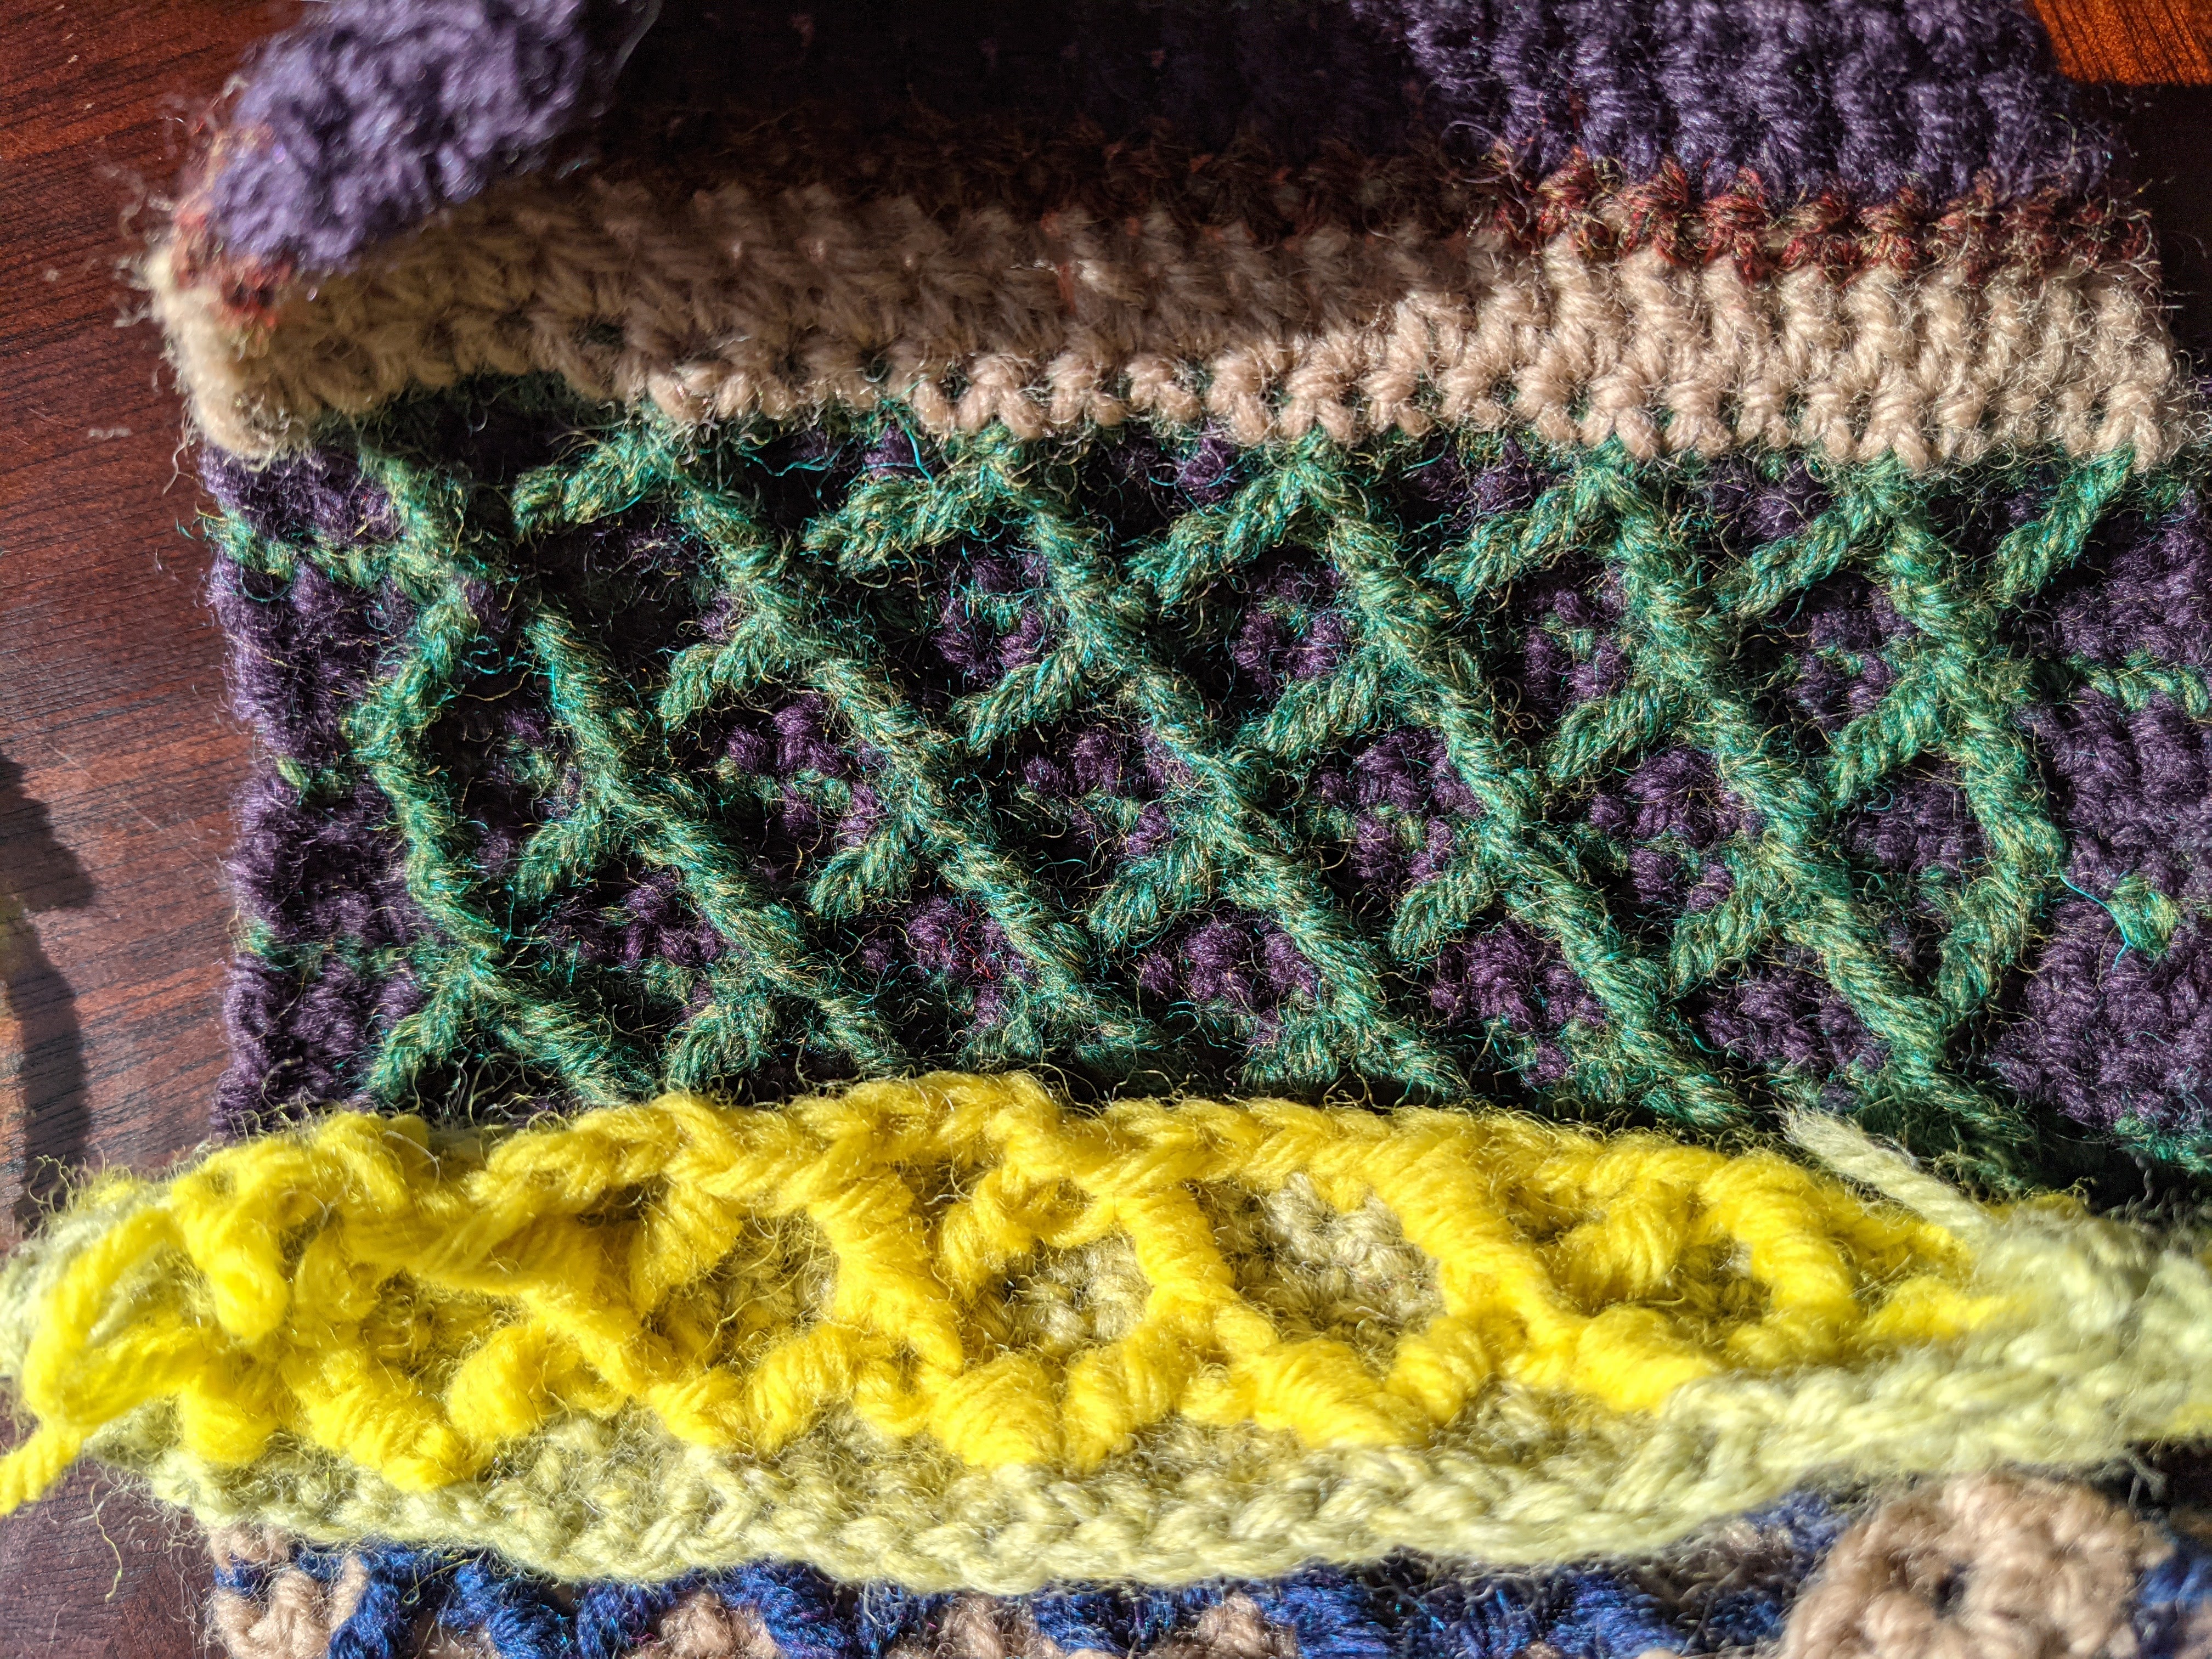
The other thing I did to make the trebles look better was switch to a smaller hook. I typically crochet with the 5 gauge, and you can see how loose and untidy the trebles looked when I tried to use that to make the lattice. So I experimented with using the 3.5 and immediately loved how much tighter the lattice looked..
For the purple base I used Wool of the Andes Blackberry. All of the other colors have already previously been used: Almond, Solstice Heather, Forest Heather, and Merlot Heather.
The Thing About the Nora
I switched the order around for this article to crochet first, game second, so I can put up the Spoiler Chocobo. I’m going to be talking about early-game plot elements, so if you’re still thinking you want to play the game you can sign off here and go play the fucking game already.

Despite not actually liking the Nora people as a whole, I really like what the game designers did with them. Aloy has been outcast from the tribe since she was born because she just kind of appeared one day outside All Mother Mountain and no one knows who her mother is and because the Nora are a matriarchal society, that’s kind of a Big Deal. She spends her entire childhood and youth training to be a part of The Proving, which for Nora teenagers is kind of like the SATs if there were less filling in bubbles, more shooting grazers, and instead of getting into college they get to be a Nora Brave. Even outcasts the right age get to be a part of the Proving, and as long as they finish they can become a Brave and thus no longer outcast.
Aloy doesn’t give a shit about any of that. Aloy doesn’t want to just finish the proving, she wants to win it, because the winner gets a boon from the High Matriarchs. And Aloy knows exactly what she’s asking for: the truth about who her mother is and how they could possibly justify jettisoning a baby into the woods.
Playing as Aloy, you spend the first few hours dicking around the Sacred Lands, doing side quests, meeting Nora, learning how the game works, and always the Proving is there, looming as the next big Main Quest step. As you finally go into Mother’s Heart, the game shows you where this is all going: Aloy just wants answers, but she’ll have to learn to be a functioning member of the Nora, as well. She meets a friend in Vala, a frenemy in Bast, and clear opposition in Resh. The story is setting itself up to be about Aloy finding a place among the Nora.
And then at the end of the Proving a bunch of Cultists show up and kill everybody. The Proving Proctor takes an arrow to the chest, a bunch of the Nora teens get set on fire, and Vala and Bast get mowed down by the arrow mini-guns that of course the Cultists have. Even Rost gets exploded off a cliff and Aloy nearly gets her throat slit.
The message is clear, even before Aloy gets her Seeker’s mark: Aloy isn’t finding her place among the Nora, she’s finding her place in the world.
I loved this.
I didn’t see it coming, so it was an honest shock when the Cultists showed up. Also, if the story had been about Aloy finding her place among just the Nora, it would almost have been like she was absolving her abusers. If she were to be comfortable living among the Nora, she’d have to find a way to be okay with all of the outcasts, right? Either that or work to change it, and how do you change the hearts and minds of people who were not only okay with outcasting a baby but continued to treat her like flaming garbage her entire life? Yeah, gross.
Happily, none of that happens. Aloy realizes she has to go out into the wider world to figure out what’s going on. She gets to meet the other tribes in the immediate area, and gets to be super salty anytime she’s called a Nora. This isn’t a story about Aloy absolving her abusers, it’s about Aloy growing past her abusers and leaving them to their own self-destructive ways. When she comes back later to help them out it’s not because they’re Nora, just because they’re people in danger. It’s why she and Varl are never going to work: she doesn’t want to be a Nora, and he doesn’t know how to be anything else.
That’s the Nora Silent Hunter Square. Tune in next time when we’ll discuss the square for Mother’s Heart and the blackout squares I’ve been mentioning.
